Wednesday, October 29, 2014

Party Time: Halloween Monster Bash

Halloween is a favorite holiday in our household, but with a little person around, we have to mix in sweet and nix the scary. What better way to celebrate than to host a not-so-scary Halloween Monster Bash? I'll admit that this party was a bit of a last minute throw together and I cut some corners when it came to preparation, but hopefully it doesn't show in the final product! Still, it was fun to plan and I think everyone had a good time.

I picked up the October Halloween issue of Better Homes and Gardens and saw an adorable Monster Party featured in its pages. Using that as my overall inspiration and creative springboard, I mixed several of their FREE Monster Party printables including a really cute invitation that was easy to assemble, a printable "Happy Halloween" garland,  and printable "Happy Monster" hat pieces, with things I either had around the house, or could easily be created with a few simple supplies.


If you've seen photos of any of our other parties, you'll know that our island usually gets a starring role. Our house is open from the living room into the kitchen, so I typically use the island as the party's central focus. I covered the surface using 2 yards each of a polka dot and orange and white chevron print. I picked both of these fabrics because I feel that they have the potential to be reused in the future (I already have a plan to use the orange and white chevron for my Thanksgiving tablescape.) I recreated the pompom garland that I saw in the magazine shoot using different sized pompoms, a needle and upholstery thread and hung it between the pendant lights.

 
I purchased three new chevron pillow covers (two in green and white and one in orange and white) to bring the party theme into the living room. I also swapped out our regular leather ottoman with the green table and matching stools from the playroom to make it more kid friendly and to provide additional seating for our little guests. On the table, I placed a basket with a Halloween themed Bingo game (I purchased the game for $5 at Target and used candy corn as game markers.)
 
 
Extra pompoms were placed in a clear plastic paint can (found in the Target Dollar Spot for $3) and made for a no-fuss table centerpiece.
 
 
The table was also the home of the build-your-own Monster hat station. Since the kids were too little to handle the scissors, this turned into an activity for the parents. The "Happy Monster" face printables were part of the BH&G Monster Pack.
 
 
I handmade the treat bags with stiffened felt and a glue gun using BH&G Monster Pack treat bag pattern. Each treat bag was filled with a light up creepy crawly insect (purchased at Dollar Tree for $1 each,) a mini container of bubbles (12 for $3 at Target,) and some silly vampire teeth ($2 for a pack at Target.) I also added some 24 piece Monster puzzles and some fun Monster Play Packs containing a small coloring book, crayons, and stickers to the treat display since they were too big to fit in the treat bags ($1 each in the Target Dollar Spot.)
 
 
In addition to having Pizza Hut pizza delivered, we had a popcorn bar (I totally didn't update the labels from the last party we hosted!) I completely took the easy way out with the food for this party.

 
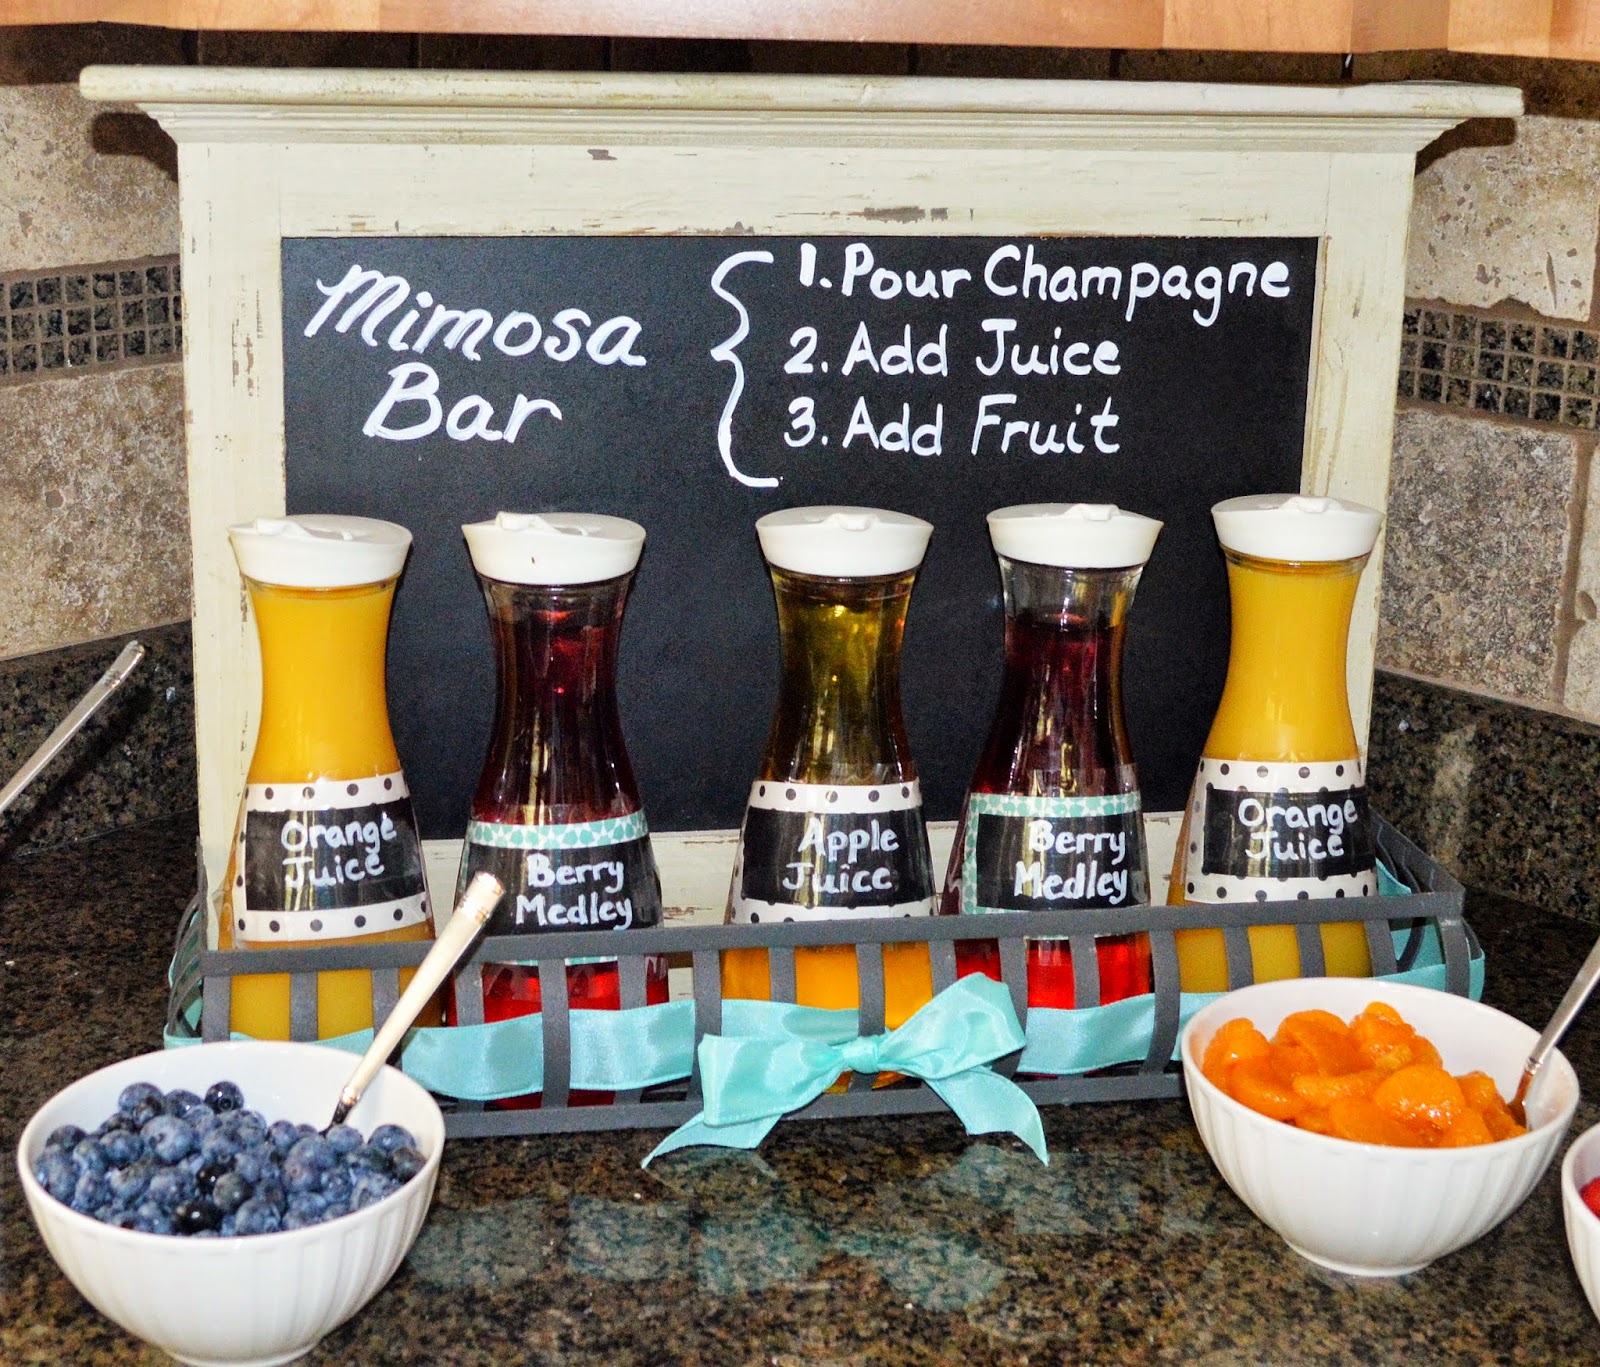
I had originally planned on slicing up apples for the caramel apple dip, but at the last minute, decided against it and made a chalk board sign with directions to cut your own. I was worried that the apples might brown sitting out on the counter even if I added some lemon juice to them and to be honest, I didn't want to have a bunch of extra sliced apples after the party to either quickly eat or end up in the trash. Plus, all the kiddos were coming with their parents so it wasn't like we'd end up with any knife wielding toddlers.


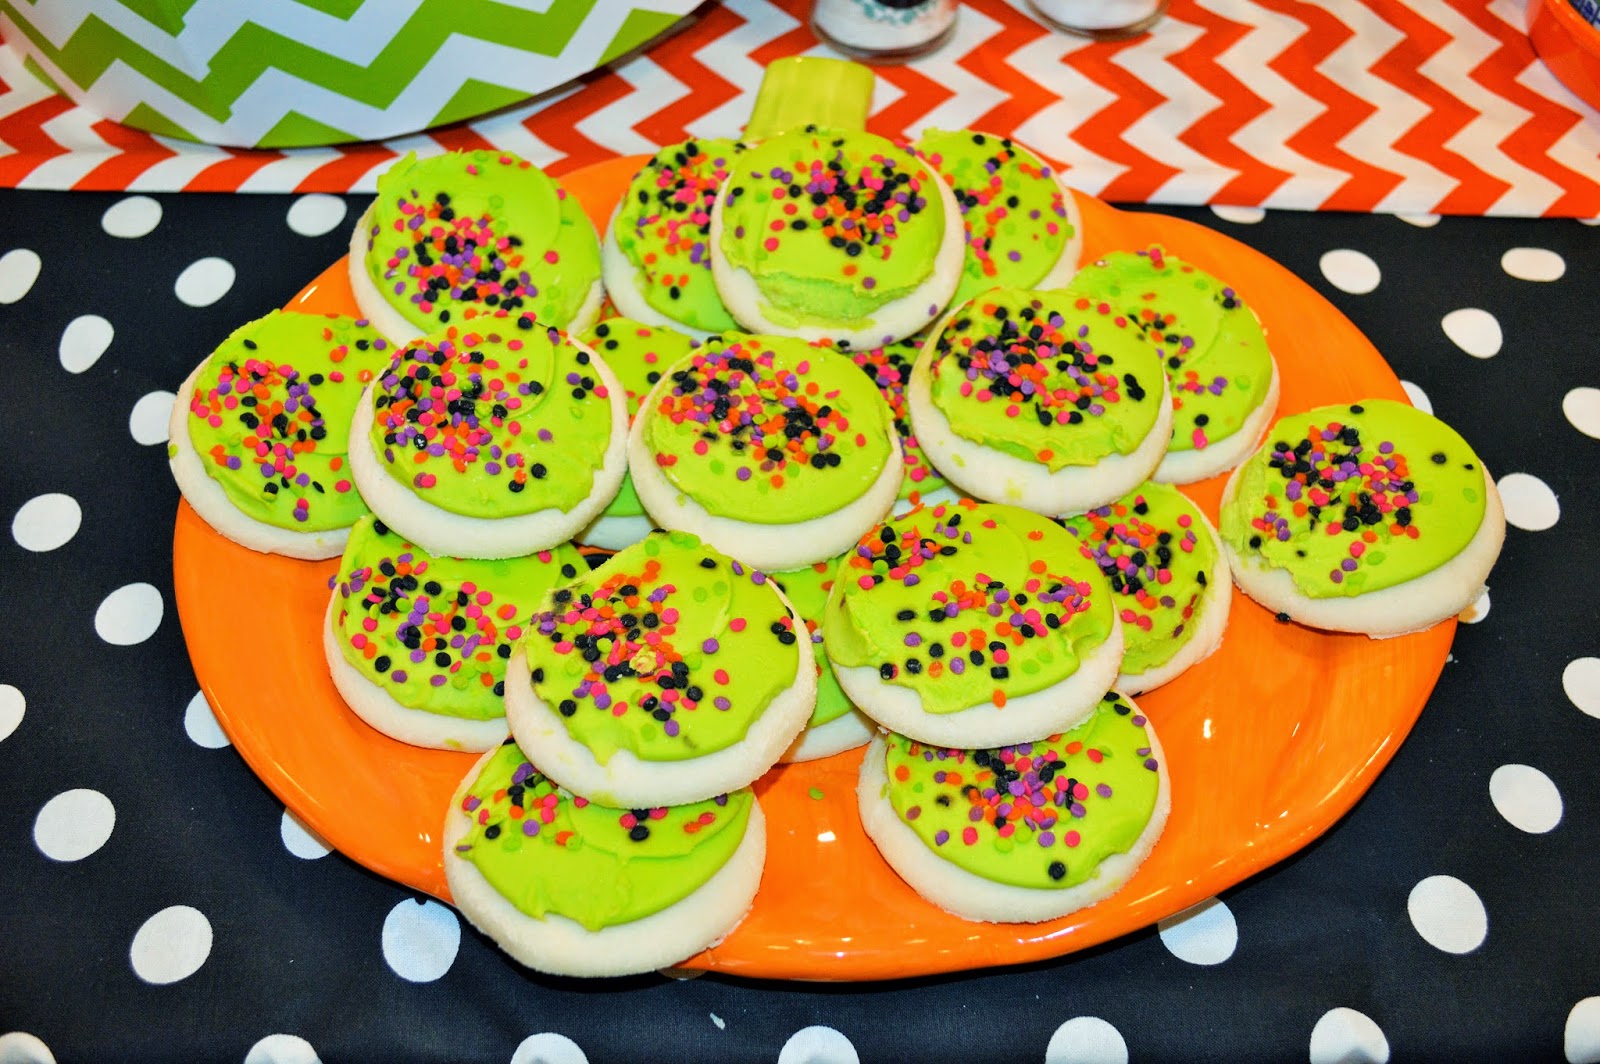
Sweets were also a product of my lack of time and preparation. It was either purchase some store bought treats or find myself baking at midnight the night before the party. Luckily, Kroger came to the rescue with these pretty and tasty cupcakes and cookies.
 
 
Dressing up our entry table for the occasion, I added some light-up Jack-o-lanterns and monster stacking boxes from our Halloween decoration stash along with a mini pumpkin my son had decorated with glitter at preschool. Topped off with some more pompom garland and a string of mini pennants, it made for a cute display.


The BH&G magazine shoot suggested using a local print shop to enlarge a monster scene to create a giant coloring mural, but when I researched the printing costs, it was going to run me close to $60! Instead, I picked up two white trifold display boards (the type you use for science project displays for $3 each,) taped them together, and tied them to my banister. Then, I took a sharpie marker and drew the scene free hand. Sure, I could have printed something out and then used a projector and traced it all out, but since I was literally starting on this at nine thirty the night before the party, I opted for the quickest and easiest option. The whole project took me about twenty minutes. My son is still coloring on it and I've agreed to leave it up through Halloween.
 
Have a very Happy (and not-so-spooky) Halloween!


Tuesday, October 28, 2014

Party Time: Easy Halloween Bugs and Kisses Treat Bags

My little guy loves Halloween, so he was really excited about his preschool Halloween Party and the fact that he'd get to wear his Halloween costume to school. Parents were asked to send in some candy for their classroom Trick-or-Treat so I made some cute and simple themed treat bags.


I used plain cellophane treat bags ($2 for 20 in the party aisle at Target,) Some little popping spider toys (They come in multiple colors with 4 in a pack for $1 in the Target Halloween section,) Hershey Kisses, Halloween baker's twine (a recent Target Dollar Spot find,) and I created the tags myself using Photoshop.

You could easily add plastic spider rings to the treat bag instead of the popping spider toys if you wanted an even less expensive option. I've included the blank treat bag tag file below and you are welcome to use it, but please provide a link back if you repost it.

To download the "Bugs & Kisses" file, click HERE.
 
Happy Halloween!

Wednesday, October 22, 2014

Cold Weather Comfort Food: Chicken and Dumplings!

The weather is getting cooler and we find ourselves eating more soups, stews, and dishes that make us feel warm and cozy. One of my favorite fall recipes is chicken and dumplings. I've always enjoyed them, but until last year, I had never attempted to make them myself. I was under the impression that they were the product of little gray haired ladies in church kitchens using closely guarded family recipes and that they took tons of time and lots of effort.  I couldn't have been more wrong!

Not only are they easy to make, they really don't require a bunch of prep, and they are delicious!
 
 
I used this recipe from The Country Cook and it is amazing! The broth is a little thinner at first, but if you can wait 20-25 minutes for it to thicken up before serving it is even better. My husband suggested adding cream to the broth, which I'm sure would be really good, just not as healthy.
 
 
I use a fondant mat to roll out the dough and a pizza cutter to cut it into the little dumpling squares. You can use whole grain flour in place of white flour if you choose.
 
 
I always use sodium free chicken stock since I salt and pepper my chicken before roasting it in the oven, shredding it, and adding it to the stock pan.
 
 
My son loves helping to cook this meal by placing the dumplings in the pot one by one. A great tip I have learned is that you can make two  (or more) batches of dumpling dough at a time. Use one in your dinner and then roll out and cut the second batch of dough into dumplings and store them flat between wax paper on trays in the freezer for later. So easy and so good!

Tuesday, October 21, 2014

Purging the Clutter Monster: Kid's Clothes

Sometimes, I look at my son and can't believe how big he has grown. He recently moved into wearing 4T clothing. I am in disbelief that the tiny little baby that I brought home from the hospital less than four years ago could be such a big (little) boy now. Such is life. Children grow quickly and that cute outfit that you purchased at Gymboree with the matching hat is worn only a few times before he outgrows it overnight.

For years, I've been stockpiling outgrown shirts, pants, pajamas and onesies. There was a time when I easily had ten to fifteen large plastic totes lining (and filling) the shelves in our basement storage area. I figured that one day we might have another little boy to wear them and it would be silly to clear them out only to have to purchase new clothing. The thing is, my son is nearly four. Some of these items have been stored in plastic totes for almost four years. Sure, we may have another child at some point, but it isn't a guarantee that if we do have another that it will be a boy. A few months ago, I decided that it was time to let them go to new homes. I pulled out a handful of favorites to keep (less than one tote's worth) and the rest were up for grabs.


After offering them up to friends first, the rest, along with a few toys, are heading to a local kids consignment sale today. With minimal effort (placing items on hangers and printing out computer generated tags,) I have the opportunity to earn 70% of the sale price. I've never participated before, but I've heard great reviews. After the sale, I will pick up any left over items and donate them to a local charity shop. My son gains space in his closet, I gain space in our basement, and someone else has the opportunity to purchase high quality gently worn clothing for their child that might not otherwise have the option to buy new.


This was the scene when I dropped off my items and they still have drop off appointments through the rest of today. It is going to be packed with merchandise. I was given an early shopping pass since I am a seller, but since my child needs nothing. I will be offering it up to friends in the area. This specific sale (KidStuff Consignment Sale) is located in New Albany, Indiana this weekend, but if you do a quick internet search for seasonal kids consignment sales, you are bound to find one in your area.

Monday, October 20, 2014

Purging the Clutter Monster: Master Closet -Part 1

We are finally getting back into a routine after a two week fall break. I dropped my little guy off at preschool and I am currently enjoying three whole hours of quiet! Not to say we didn't have a great time together during his time off. We slept in until almost 9 am every morning which was amazing and we played games and generally just slowed down. I often forget how much we need that every now and again.

I've been spending my evenings reading the Becoming Minimalist Blog and it not only compliments what I'm trying to accomplish with the 31 Day Purge from A Bowl Full of Lemons, but also provides some great tips and philosophy on why it is important to loose the clutter from our lives. I don't know if I will ever be able to consider myself a minimalist, but if purging items makes my life simpler and more enjoyable, I'm game.

Yesterday, I was motivated and began purging my closet. I decided that I'd be a crazy person to try to do the whole thing at one time so I focused on the top rack which contains both long sleeved and short sleeved shirts. In addition, I purged my sock drawers (I am happy to say I am now down to a single drawer,) my winter accessories, my T-shirts, and my hats. The result was one and a half garbage bags full of items that will be heading to a local charity shop. I pulled out a handful of really nice high end pieces to take to a local consignment shop, but everything else is already packed into my car ready to drop off on the way home after preschool pick up.


I still have quite a bit of work ahead of me to get my closet cleaned out, but if I tackle a section and a few drawers every few days, it will be complete before I know it. I didn't get to this point overnight, and I accept that it will take some time to dig myself out, but I feel that I'll be happier without all of the excess.

Monday, October 13, 2014

Purging the Clutter Monster: Games

Today's challenge was to purge games. We keep games in two places: the playroom and in our hall closet. The playroom shelves have recently been purged since we had a neighborhood yard sale a few weeks ago and we already have a great storage solution for puzzles, but our closet needed some attention. I took everything out, checked to make sure that all the game pieces were accounted for, and then repositioned them neatly.


 I'm sure some of our games will be purged in the future, but my son is just getting into them and most are under a year old. Ideally, I'd like for the games to move down to the playroom, but right now we seem to end up playing with these favorites in our main living area frequently, so they are more accessible in the hall closet. While I wasn't able to purge many games, I was able to purge a few winter coats while tidying up the games, so I'll call that a success.

Friday, October 10, 2014

Purging the Clutter Monster: The Pantry

As I mentioned a few days ago, I'm participating in the 31 Day Clutter Purge over on A Bowl Full of Lemons. Check out the before and after photos of my pantry purge:


This job took me way longer than anticipated since my three year old insisted on "helping" me with the process, but it is finished and I love the fact that I can see what we have in the pantry at a glance rather than digging around or in some cases, making an unneeded purchase because I couldn't find an ingredient I was looking for.

In the process of organizing my pantry, I discovered an awesome range of food storage canisters from OXO. They are airtight and stackable:


I purchased a set similar to these at Sam's Club for $79, so if you have a Sam's Club membership it might be a good idea to check there first. I'd like to get a second set eventually so all of my pastas and snacks can have neatly organized homes, but until then, I'm happy with my progress.

Thursday, October 9, 2014

Party Time: Engagement Party!

 When my brother announced that he was engaged a few months ago, we were all so happy for him. He seems like he is in a really good place in life and it is terrific he has found someone to join him on his journey through life. My husband suggested that we throw my brother and his new fiancé an engagement party to celebrate and I was definitely onboard.


My brother's fiancé sent me an adorable card with chalkboard font to ask me to be a bridesmaid in the wedding. I decided to use chalkboards, burlap, and this aqua that she loves for inspiration for the party. We scheduled the event the first weekend in October and since the weather can be really difficult to predict this time of year, I opted for an indoor party with the option of using our deck and patio for additional seating areas if weather allowed. While the sun shone brightly, we experienced some cold wind. Needless to say, the guests remained indoors.


The party was scheduled for 2 pm so it was after lunch and before dinner. I went with some fun snack and drink options including this Make-Your-Own Mimosa Bar.
 

Yum, Mimosa Bar... my favorite! I was able to grab these carafes for $3 each at an Old Time Pottery store. The Chalkboard shelf was a find at Gordman's and I'm certain I will be able to find lots of uses for it in the future. I threaded some wide satin ribbon through the base so it would tie in with the theme and color scheme. I purchased the plastic champagne flutes at Party City for $9.99 and I used some neutral wrapping paper with cream dots from the Target dollar spot to line my countertop.

"He Popped the Question," so I created a Popcorn Bar with different seasonings and toppings. I picked up this iron basket at an auction for $2 a few months ago. I didn't have a plan for it at the time, but once I lined it with some of the dollar spot wrapping paper, it was a perfect container for the popcorn. I used a wire basket lined with burlap to hold the aqua and white striped popcorn boxes (purchased at Party City.)


I picked up some glass salt shakers for $2 a set from Gordman's and filled them with seasonings that I found at Kroger. If I had thought about it beforehand I would have researched making my own, but the thought didn't occur to me until two days prior to the party. I also filled two glass containers with toppings (peanuts and M&M's.) I had theses containers already, as I had used them for a previous event, but they can be purchased at Michaels for $5 each. The scoops were found at Party City for $.79 each. Personally, I would have liked to use all clear scoops, but had to settle for some metallic ones since they didn't have enough in stock. Serves me right for waiting until the last minute to purchase them!


Donuts = Rings. Yes, I realize it is silly, but it gave us an excuse to get some glazed donuts from a local donut shop, Donut Frenzy. Seriously, this guy makes some amazing glazed donuts! I placed the donuts on a wood slice (found at Michaels in the wood burning craft area) and lined it with brown paper (I used mailing paper, but you could cut out a piece of a brown paper grocery bag just as easily) so the donuts wouldn't have to sit directly on the wood.


After a warm Indian summer, we were hit with some cool fall weather. What better way to warm up than with Hot Cocoa? Guests were invited to enjoy the Hot Cocoa Bar complete with marshmallows, mini chocolate chips, caramels, and whipped cream. I punched some tags for the marshmallows and chocolate chips, taped some pretty matching scrapbook paper around the whipped cream, and I borrowed my Grandmother's Keurig since I don't have one of my own (yet!) Tada... instant Cocoa Bar!


We needed a little sweet with the salty, so I went the easy route and picked up some mini cheesecakes at Sam's Club for the occasion (they come frozen so just pop them into the fridge the night before to thaw.) The mini cheesecakes looked cute piled on a cake stand and they saved me from having to do any baking.


I found this adorable box at Gordman's and created and printed some advice cards so that guests could write advice for the couple as they embarked on their wedding planning journey. In addition to the advice cards, there were also fun engagement story Mad-Libs for guests to complete, but I don't believe they made it into any on the photos.


I made this print the centerpiece of my tablescape. It says, "Being a Family Means You Will Love and Be Loved For the Rest of Your Life No Matter What." I thought it was such a great sentiment and appropriate for the occasion. This print has now found its way into our hall bath because I liked it so much.

 
I finished up my party décor with balloons, because every party needs balloons!

Monday, October 6, 2014

Purging the Clutter Monster: October Challenge!


It's October, and what better time to tackle that scary clutter monster?
 
    I've joined the purge challenge hosted by A Bowl Full of Lemons. I'm in desperate need of some de-cluttering around my house, so when A Bowl Full of Lemons Blog announced their 31 day purge, I was definitely on board. I'm not exaggerating when I say that I needed this.

   My cleaning lady isn't allowed to clean my office due to the outrageous piles of stuff that has take up residence in that room. It is seriously an embarrassment. My husband jokes that all he owns are some clothes, tennis racquets, and his toothbrush and that the rest of the contents of our house are mine. Sadly, he isn't too far off. Between my love of all things crafty, teaching supplies, vintage finds, and party supplies there isn't room for much more. The excess really wasn't as noticeable before we had our son. I was able to squirrel away items in closets or tuck them away into cabinets, but with the added toys, books, and other kid stuff, I've lost some of my nooks and crannies. The result is a clutter monster that tries to escape into the common areas of our home almost daily.

   Don't get me wrong, I have some great stuff and I feel fortunate to have such excess, but when quantity starts to trump quality of life you know it is time to let it go and get things under control. I'm currently on day three of the challenge and so far I've tackled my pantry and my magazine obsession. Today, I'm moving onto my dresser drawers. Join the purge party at A Bowl Full of Lemons Blog and get your clutter monster under control.

* Like the monster art? Learn how to make your own cute little monster image using the Create a Cute Furry Vector Monster in Illustrator tutorial.