Sunday, August 31, 2014

Playdate: If You Give a Pig a Pancake Playdate

I'm relatively active in a local "Mommy and Me" playgroup. It not only provides my son with an outlet that is semi-structured to test out his budding social skills, but it also provides me with some time to connect with other moms with similar aged little ones. The group is run through www.meetup.com and is very active. Membership requires attendance of at least two daytime events a month and paying yearly membership dues. Our group calendar is packed full of events and there are plenty of opportunities to get together between park playdates, festivals, and other scheduled in-home playdates.

Personally, I prefer in-home playdates to the more public events. I generally feel more relaxed and able to actually chat with the other moms while the kiddos play together. About once a month, I host a themed playdate in our home. Most recently, my theme was "If You Give a Pig a Pancake" based on the popular children's book by Laura Numeroff.

 
We did a read aloud of our book, If You Give a Pig a Pancake. I made mini pancakes on our griddle and everyone was invited to add toppings to their pancakes to suite their taste. I included bananas, strawberries, blueberries, syrup, chocolate syrup, and whipped cream. It was a huge hit, but  I was so busy snacking and chatting that I completely forgot to take photos during the playdate. Oops! Here are a few I snapped before our guests arrived and the fun began.

 
Normally, during the warmer months, we set up our playdates outdoors on our patio. We have a great outdoor couch and it makes for a great space, but at the last minute, I decided to move our playdate inside due to the crazy humidity and heat. Instead, of using our downstairs playroom (which is generally perfect for playdates), I opted to keep the food upstairs and brought up a few baskets of toys into our family room to keep the playdate clean up at a minimum.


I also added some board books on the ottoman so that any kiddos who wanted to continue to read/ look at books would have the option to do so.

 
It didn't seem like I brought a lot of toys up for our playdate, but once all the bins were emptied, toys covered the floor. My little guy couldn't wait for everyone to arrive and started playing and digging through the bins shortly after this picture was taken.
 

Friday, August 22, 2014

Party Time: Mickey Mouse Themed Birthday!

  One of my favorite things to do is throwing themed (perhaps a bit over the top) parties for my friends and family. If I throw a party for you, it basically means I think you are pretty terrific as (almost) any amount of money would not begin to cover the time and thought that I put into these events.

My son has been the recipient of multiple themed parties and it kind of takes everything I have to reign myself in even when I'm hosting a themed playdate (which we do at our home once every other month or so.) For his second birthday, I choose Mickey Mouse and Friends as his party theme. We were planning our first trip to Disney World just a few weeks before his birthday and I figured I'd ride the Disney excitement wave as long as possible. Plus, as I later discovered, you only get so many years of choosing a birthday party theme before your child grows wise and opinionated (but that is another story entirely!)

I started with a theme and then did what every modern mommy does... I headed to Pinterest. From there I was able to pick and choose ideas that I thought would best fit my vision of a Mickey Mouse and Friends Party. Here are the results:


First up, the CAKE! This was my first time ever working with fondant and I was pretty pleased with the results. I used a recipe for marshmallow fondant so not only did it look pretty, it tasted good too! While at Disney World, I picked up a pack of cookie cutters that included the mouse ears shape and the star, so it made cutting the fondant and decorating the cake super easy. As a note, I would not attempt making this fondant recipe without a Kitchen Aid standing mixer (or other such heavy duty mixer.) The fondant is super thick and the amount of mixing involved is pretty intense. Unless you have mega arm and hand strength, I do not recommend doing it by hand! Also in this photo, you can see the few cupcakes I made just in case the cake was a disaster and I was forced to scrap the whole thing. Luckily, that didn't happen, but it was good to have a contingent plan just in case as I was dealing with unknown baking territory.
 
 
Next up, the FAVORS! Simple (and inexpensive) toys made up this cute tiered display. Guests were invited to pick their own favors and make their own treat bag. To follow the theme, I choose items that were brightly colored including bubbles ($1 for a pack of 3 at the Dollar Tree), yo-yos (ordered from Oriental Trading), flying disks (ordered from Oriental Trading), and play dough ($1 for a pack of 3 at the Dollar Tree.) I dressed them up with printable labels from Amanda's Parties To Go.
 
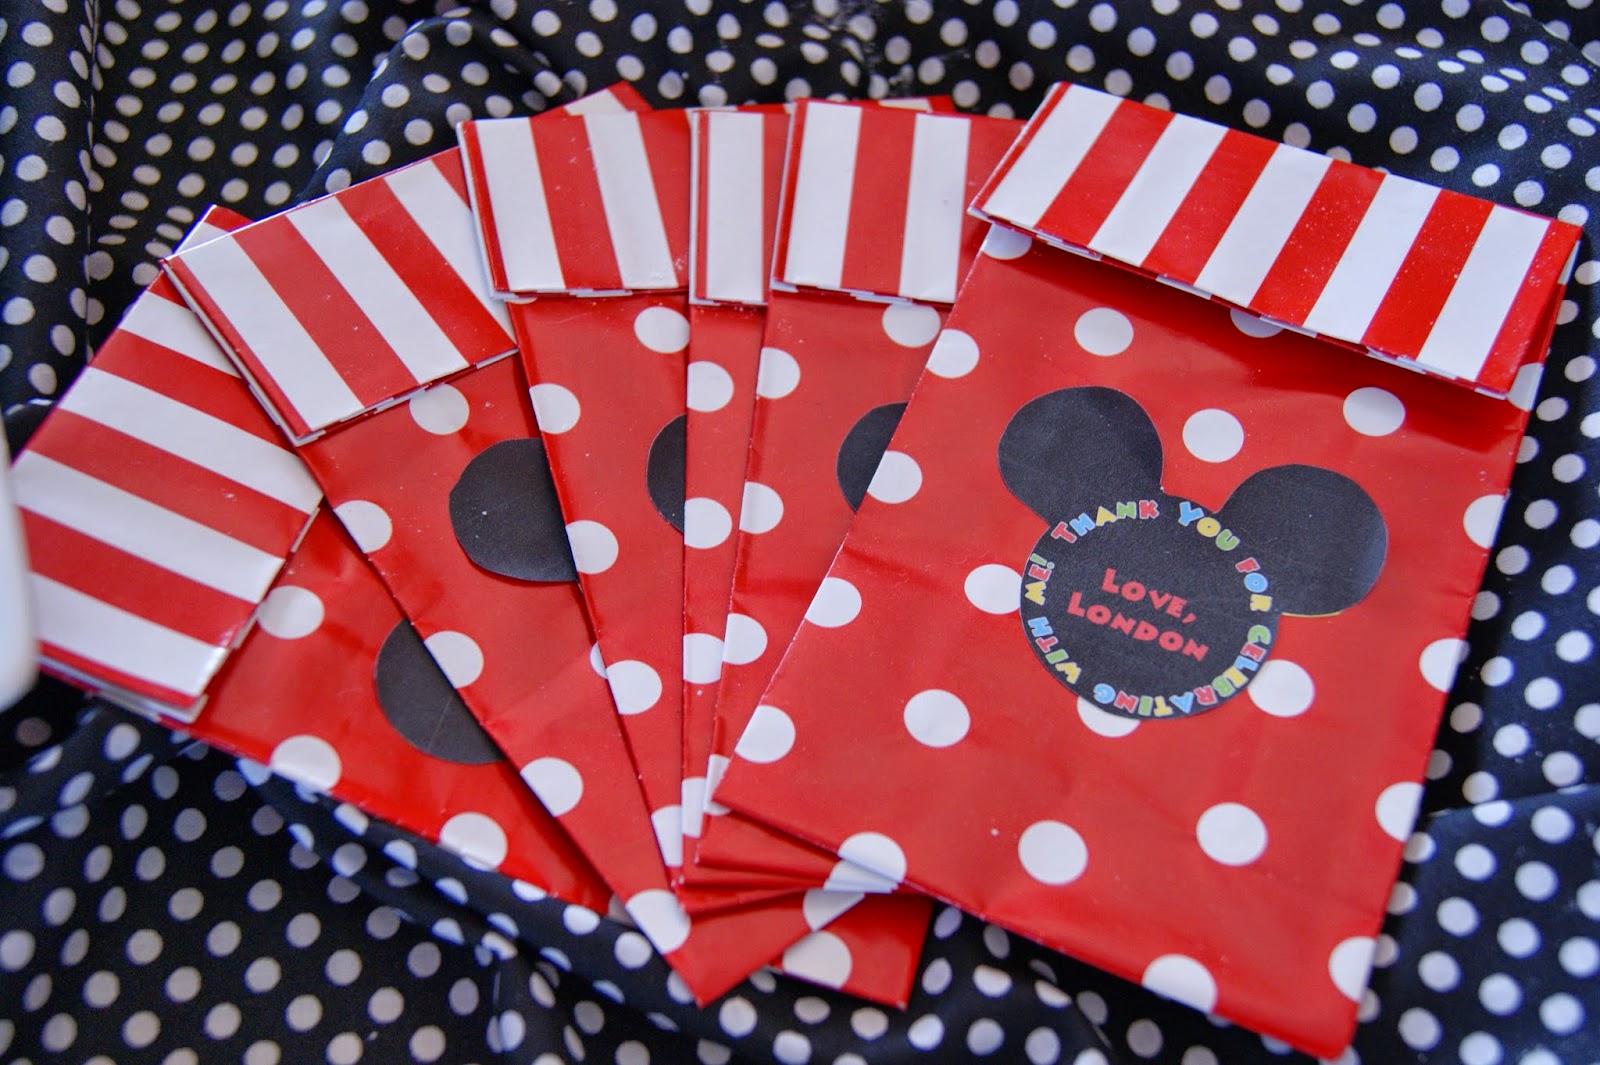
I added these personalized Mickey ears stickers to the front of some fun red polka dot and stripe paper bags (ordered from Oriental Trading.) These bags were placed in the favor area for guests to take home their treats.
 
I always try to incorporate a few balloons into each party because really, who doesn't love balloons? I was able to find these perfect red polka dot balloons and paired them with plain matte black balloons to represent Mickey Mouse.

To create this adorable "partyscape" centerpiece, I used the printable files from Amanda's Parties To Go. I hot glued simple wooden kabob skewers on the back of each cutout and then cut them to various heights so they'd make a dynamic arrangement. I purchased a simple rectangular square vase (which has found it's way back into every party design since.) I hot glued a yellow broad ribbon around the center of the vase and then topped it with a red polka dot ribbon on top, To cover the ribbon ends and to make it even cuter, I glued yet another adorable printable, this one of a number "2" that looked like Mickey Mouse. I filled the vase with M&M candies. They worked great to keep my arrangement in place and they were the perfect party colors.
I created a second centerpiece for the kitchen table with a few different themed cutouts.


I liked the M&M candies so much, that I ran out an bought a few more smaller square shaped vases to decorate and add to the "partyscape."


Hershey Kisses got a makeover with tiny printable stickers placed on the bottom of each kiss.


Hershey's miniatures were personalized with wrappers that matched the Mickey and Friends theme. This was quite a bit of prep since I had to cut out each little label and tape it tightly around each chocolate bar, but it is all in the details, right?

I have a really cute set of Mickey Mouse themed dishes that my mother gifted me years ago and they worked really well to serve food  for the party. This mug worked perfectly to hold the lollipops adorned with themed printable stickers.

Aside from all of the candy, we did in fact serve lunch. We had simple BBQ pork (cooked in our handy-dandy crock pot) sandwiches, potato chips, potato salad, and fruit. I used this red caddy that I had among my classroom items to hold plates, napkins, and plastic ware. The bowl, I picked up at Target for $14.99. I also purchased a few smaller condiment bowls at Target that matched the larger bowl for $5.99 each, but they didn't make it into any of my photos.

The birthday boy had to look the part, so I dressed him in a Mickey thermal shirt and vest set that I found on sale at Sears. The vest was a size 2T-3T and he got SO much wear out of it. He also wore his Mouse Ears that we bought on out trip to Disney World.
I hand painted wooden letters (purchased at Hobby Lobby)  that spelled London's name and to make them look like Mickey and Friends characters. The extra little details that are glued on (Minnie and Daisy's bows, Donald and Goofy's hats) were created using the Mickey and Friends Cricut cartridge. I added a matching "Happy Birthday" banner and sat some plush Disney friends on the mantle to bookend the letters.
 
We have a picture that hangs over our entry table that didn't go with the birthday theme at all, so I temporarily covered it with wrapping paper that matched. The entry table became a great place for guests to drop off gifts for the birthday boy.
 
 
I showed old Mickey Cartoons from the 1920's-1940's on the television in the living room on a loop. A word of caution:  Mickey does some pretty questionable things in these early shorts including  smoking, and dressing up in what appears to be black face. I had no idea! Nevertheless, it gave the adults some entertainment to pick out these moments while the kiddos played obliviously. Walt Disney Treasures - Mickey Mouse in Black and White

Here is a final look at the main partyscape area so you can get an idea of how it all came together.


Tuesday, August 19, 2014

Storage Solution: Puzzles!

  Puzzles are HUGE at our house. My little guy loves to sit by himself and work through them and I love that he can work quietly and independently and give me a little break. The great thing about puzzles is that they are cheap entertainment and you can find some really cute ones at the Dollar Store. The bad thing is that puzzle pieces are small, their pieces can be easily lost, and they come in tiny boxes of various shapes that are a nightmare to store.
 
 
  I found these great zipper pencil pouches at Big Lots in the school supply aisle for $1 each and their uses are truly endless. Each pouch has a durable plastic window on the front so you can easily see what is stored inside. When I was trying to figure out a better storage solution for our crazy mess of puzzles, I decide that these pouches would provide the perfect solution. First, I cut the front of each puzzle box and placed it in the front of the pouch and then stored the puzzle pieces behind the cardboard picture. Each puzzle is contained in its own little pouch and multiple pouches fit in a storage bin neatly tucked away until next time. 

Monday, August 18, 2014

Playroom Tour!

Anyone who knows my child, knows he has way too many toys. This is the product of being both an only child and an only grandchild on my side of the family. I strive to keep an orderly home, but with baskets of toys spilling out into our living room, it was nearly impossible. Thankfully, we had room to grow and I was able to utilize some space in our basement to create the perfect playroom.

 
The best part about this project is that it didn't break the bank. I reused some tall bookcases that we've had forever, making sure to anchor them to the wall so they can't be pulled over by little hands. I believe I originally purchased them at a Walmart, years ago. They have adjustable shelves so I was able to modify the shelving to fit everything.


In addition to housing my little one's ever-growing toy collection, I was able to place all of our family games on the upper shelves which opened up some space in our hall closet. My mom found these utility bins by Martha Stewart on clearance at Kmart and they were the perfect color. I love when I can use baskets or bins to hide things away. I plan on making a cute tag label for each bin, but haven't gotten around to it yet. The second shelf down from the top holds bins containing painting supplies, Play-doh, and a few more games. I like that this shelf is out of reach for little hands.
 

 The bottom three shelves house toys that can be easily accessed. The bins are packed with like items. For example, one bin has Viewmaster viewers and reels, one has puzzles, one has busy books and grab and go activities for the car, one is full of Fisher Price Little People, and one is home to Mickey Mouse and Friends figures.

Next to the bookshelf, is a handy easel that I purchased at Ikea with a roll of butcher paper attached. We move it outside to finger paint, but keep it inside to use with chalk, water colors, markers and crayons. I love the little paint containers from Melissa and Doug that control how much paint can be put on brushes and they fit perfectly in the easel tray.


 Next to the easel, I placed a chunky legged table from Ikea with matching stools. I works great working on arts and crafts or playing board games. While shopping at Ikea, I also added this giant canopy leaf. I didn't have a real plan for it at the time, but the color matched and it found a place in the corner of the room. To brighten up the space and help set it off from the rest of the room, I used two colorful floor rugs also from Ikea. I had these from my days teaching elementary school and am SO glad I didn't leave them behind for my replacement. They are super durable and fun to boot. I mounted a magnetic white board on the wall at child height so we can work with magnetic letters and shapes. Later, we'll break out the dry erase markers, but he isn't quite there yet.


 Crayons, markers, chalk, colored pencils, Play-doh, and all things crafty that I don't necessarily want my little guy to have unlimited access to are stored in this handy wall-mounted storage shelf. Coloring and activity books are stored in magazine holders on to of and next to the piano. The festive Mickey Mouse and Friends "London" letters were created for my guy's second birthday and they found a home above the storage shelf and add some additional color to the room. I also keep a CD player handy in this space and lots of kid friendly music and read-aloud story book CDs in this area too.

I hope you enjoyed your tour of our Playroom!


Monday, August 11, 2014

Highlighting the Beginning of the School Year

My little guy started preschool today and while part of me yearns for the days when he was just a little cooing baby, the other part of me is having a little party, because preschool means two three hour blocks of freedom a week! I have so many plans and projects swirling through my head. The possibilities are endless.

As a token of my appreciation to the lovely ladies who will be filling up my son's preschool hours with fun, games, and learning, I made up some cute little beginning of the school year gifts.


I found this adorable idea where most all crafty ideas reside, on Pinterest. The Tomkat Studio created these fun (and free!!) little tags for an sweet and easy teacher gift that won't break the bank. A quick stop at the office supply store, a printer, a hole punch, some twine, and ta-da! I kind of love them, and even if I didn't have an unhealthy obsession with office supplies, I still think I'd appreciate the thought.

Sunday, August 10, 2014

Scaling Mount Washmore

I'm not sure why sorting dirty clothes into like colors, placing them in my washer and then coming back a half hour later to transfer them into my dryer causes me so much disdain. Considering the attitude I have toward doing my family's laundry, you'd think I have to haul my laundry to the riverbed and beat it among the rocks, which couldn't be farther from the truth as I have a lovely LG high efficiency front load washer and dryer. Yet, the laundry piles up and I refuse to acknowledge it until it has become an insurmountable summit that spills out into the hallway. This happens approximately once every two weeks. However, while shopping at World Market yesterday, I may have found a product that will forever change the way I look at laundry.

Introducing the HEDGEHOG Dryer Buddies by Kirkland...

Seriously, look at their adorable little hedgehog faces. How can I not be excited to toss them into the dryer so they can tumble amongst my towels. All the while fluffing them and apparently saving me both money and energy (or so the box claims.) Simply drop the hedgehogs into the dryer and they will use their hedgehog magic to soften, fluff, and reduce static.

 I've been busy scaling my laundry mountain today with the help of these little guys and while my clean laundry is soft, fluffy, and static free, I'm not sure if I should attribute these qualities to the use of my new found Dryer Buddies, or the fact that I'm actually folding my laundry when the drier timer announces the end of its cycle instead of letting it sit until it becomes a wrinkled heap of laundered garments. The thing is, I don't really care if they are successful at all that they claim to do, by using their hedgehog cuteness alone, they motivated me to scale Mount Laundry with a smile on my face.

Friday, August 1, 2014

All About Me

Hello! I'm happy that you have stumbled upon my own little corner of the blogosphere. I've created Jade Spaniel to showcase some of my current and past creative projects. In addition, it serves as a catch-all for all of my commentary on my journey to organization and my obsession with the idea of minimalism. I'm a former teacher turned mommy/ event-planner/ author/ and mobile boutique owner.

I own an extensive collection of My Little Pony toys and have written multiple collector guides on them. I also am a contracted event promoter for Hasbro, Inc. and coordinate their national My Little Pony collector convention. If you'd like to know more about that, feel free to visit my blog, My Little Pony Collector.

In my spare time, I run Found and Fabulous, a mobile boutique truck. We offer unique décor, vintage inspired apparel, jewelry and gifts.  In an age when food trucks are all the rage, Found and Fabulous offers boutique shopping on the go by setting up shop at area festivals and markets. V