Showing posts with label Party Time. Show all posts

Wednesday, April 29, 2015

Playdate: Little Leprechauns St. Patrick's Day Playdate

 I have so many things to post about, but finding twenty minutes to blog has been a struggle. We've had a full schedule in March and April and I hope to give you a glimpse of some of the fun.

Typically, when spring rolls around, I tend to focus on all things Easter in my decorating, playdates, and parties. My home is usually filled with bunnies, chicks and pastels and I love it. This year, however, I decided to mix things up and go green for St. Patrick's Day. I hosted a Little Leprechauns playdate at our home.

 It was a morning playdate, so I went light on the snacks and purchased Shamrock Cookies from a locally owner bakery, Heitzman Bakery. I typically go with Loft House Cookies, but the selection at our local Kroger was pretty slim and these were still yummy and festive.

When planning a Playdate, I like to develop activity stations that are not only age appropriate, but high interest for the little ones. Plus, if the kiddos are happy, then the mommas get chat and hang out, and let's be real... that is at least 50% of why we go to Playdates! This station I called "Create a Sticker Scene." Preschoolers and toddles LOVE stickers so this station was a favorite.

I pulled out some green cardstock that I had in our home office and placed it on our kitchen table. I had picked up some fun St. Patrick's Day themed puffy stickers at the Dollar Tree and I tossed them in a basket along with some crayons. I've found that puffy stickers work best because little hands can easily peel them off the backing.

 
The second station, was a simple "Play-Doh Play Station." To make it fit into the holiday theme, I used green Play-Doh and kneaded nontoxic gold glitter into it to make it sparkle. In the past I've made my own Play-Doh and there are some great recipes out there, but a few months ago, I discovered that Wal-Mart stores sell Play-Doh for fifty cents a can. You can grab a variety of colors, or in my case, load up on 10 cans of green. Not only did it only cost me $5, it also saved me time and cream of tartar (seriously, the homemade Play-Doh recipes always clean me out of cream of tartar!)

 
The final station was a fun "Photo Booth Station." This was my favorite. To create your own at-home photo booth, all you need is a couple of yards of fabric, something to hang it on, fun themed props, and a digital camera. I use a portable double clothes rack that I had in the basement to hang the fabric and then use duct tape to tape the fabric to the bar.  You could always tape your fabric straight to the wall, but I'm afraid of it pulling the paint off during the removal process and I don't want to have to touch up my walls. The fabric that I used for this photo booth was originally used for my son's Mickey Mouse themed birthday party a few years ago and it was perfect.
 
All of the photo props came from the Dollar Tree and I borrowed the green tub from our front bathroom. It usually stores my son's bath toys.


To tie in the St. Patrick's Day theme in the entry way, I pinned some fun sparkly shamrocks to our repurposed shutters that act as a seasonal display for photos, cards, or L's artwork.


We had a great time and ended up with some super cute photos of everyone from the photo booth that we shared via email and Facebook with the group.


Monday, February 16, 2015

Party Time: A Gal-entine Chocolate Tasting!

First, let me say that my neighborhood is awesome. The people are friendly, the school is terrific, and it is just plain fun to live here! The local ladies of the neighborhood plan a monthly game of Bunco (involving lots of shenanigans) and there are lots of other gatherings that take place throughout the year from cook-outs to ice cream socials.


 In an attempt to get more involved and make the most of living in this great community, I organized and hosted a Valentine's Day themed event in my home. Since this was open to all the "gals" in the neighborhood. I affectionately dubbed it "A Gal-entine Chocolate Tasting."

The concept is simple. Pick out 6 different types of premium chocolate, taste them, and record your findings. Add in some champagne, and snacks and you've got a party!

I found a roll of chevron print wrapping paper for $1 at Michaels and used that to cover my island area and create the base for my partyscape. Not only did it look cute, it also provided a clean surface to place the chocolates so I didn't need to clutter things up with extra plates.
 
I purchased this large chalkboard with scalloped edges at Michaels in their new "Make Market" section. (I seriously could have loaded up my cart from things in this aisle, but I resisted. When I get a really great coupon, I'll be ready to go back and pickup some more fun stuff!) I used a chalk pen and wrote out the basic procedures for the activity. I picked up the chalkboard standing markers at Gordman's for $3 for a pack of 3. I used them to identify each type of chocolate and to number them from 1 to 6.

The Popcorn Bar made yet another appearance at this party. It is so easy and always a big hit. I lined the basket with more chevron wrapping paper and added a new sandwich board sign to the mix. The sign was purchased at Michaels for $3.99 (but I'm sure I had a coupon so it was slightly less than that.) One side is a chalkboard and the other is a dry erase board. To give the seasonings some height, I placed them on a photo box decorated with metallic hearts and arrows ($2 on sale at Michaels.)


To balance out the salty popcorn, I added some Lofthouse sugar cookies. If you haven't tried these yet, you need to get some immediately. They sell them at Kroger (and other places as well) and they are delicious. If you don't feel like baking, they are a great option and are one of my go-to solutions when I don't want to get my kitchen messy. 

Another favorite made a repeat appearance: The Mimosa Bar. This time around, I simplified it offering only two types of mixers (orange juice, and Ocean Spray's Cranberry Wave.) The champagne paired really well with the chocolate and it just made the whole affair feel extra fancy. I sliced up some strawberries and raspberries to be used as a snack or drink garnish (or both!)

I placed a tray with both the tasting mat printables and the scoring page printables along with a cup of sharpened pencils on our ottoman. These printables were created by www.thedatingdivas.com (and they are FREE!)

To carry the Valentine's vibe into the living room, I switched out one of my square pillows with a red chevron cover (I also use this at Christmastime) and added two new "love" throw pillows (purchased at Kohls) and couple of heart shaped pillows that I had picked up in the Target Dollar Spot a few years back. It turned out really cute and festive (please ignore my son's over the door basketball hoop in the background lol!)

The Gal-entine Chocolate Tasting was a successful gathering with lots of chocolate, champagne, and fun had by all. In fact, I ended up taking the tasting on the road by request to both my book club meeting as well as a friend's spa night she hosted in her home this past week. Needless to say, I've hit my chocolate quota for awhile. Not that I'm complaining. ;)


Saturday, January 3, 2015

May the 4th (Birthday) Be With You!

It is no secret that we are all big Star Wars fans, so when our little guy turned four, what better way to celebrate than with a May the 4th (Birthday) Be With You Party! Matt collects Star Wars items, so he was pretty excited to bring some of his items out of storage to provide party décor. He may or may not have asked about keeping them permanently displayed in our living room. He may or may not have been promptly shut down. 😆

May the 4th (Birthday) Be With You Partyscape

Our mantle got a temporary makeover with Star Wars paper pennants, and buckets of  themed photo booth props.


Lots of lightsabers, meant a few impromptu battles. 

Masks, old Halloween costumes and some quick quotes glued to wooden dowels made quick and easy photo props.

Gingerbread Men turned Wookie Cookies with the help of a fork, some black icing, and a few silver cake decorating bits.

Lemonade is always an easy drink choice along with bottled water for the kiddos.

I went super simple with the cake and just added some  sugar stars I cut out of fondant, some paper cutouts hot glued to toothpicks, a glittery silver number 4,  and a couple of simple Star Wars toys.

This was my husband's favorite part of the party décor. I removed everything from our living room built in and temporarily replaced them with everything Star Wars.

We ended up with some great pictures of our friends in front of our makeshift photo booth. I took a cheap rolling clothing rack that I had in the garage and taped blue tool over the top. Then, I hung clear Christmas lights in the back so they shined through. Instant twinkling stars backdrop!

Great minds think alike! They looks so cute in their matching shirts.


This metal Star Wars sign was one of only a handful of things that I actually didn't source from our garage. Of course, it made its way into Matt's collection afterward.

Our friends were all such great sports with dressing up and getting into character.

Getting some use out of some character mugs and vintage trading cards.

We kept the food pretty light with fruit, cheese and crackers, Chick-Fil-A nuggets (as requested by the birthday boy) and cake!

Everyone went home with a silver little treat bag full of Star Wars themed goodies.


Tuesday, December 16, 2014

Playdate: Reindeer Games

Last week, I hosted a festive playdate featuring Santa's antler-adorned friends, the Magic Reindeer. I had big plans for this playdate, but it was scaled down due to the fact that I was being overly ambitious. With Christmas less than two weeks away, and another themed birthday party on the horizon I just didn't have the time (or energy!) Still, I think the Reindeer Games playdate was super cute and all who attended had a great time.


The inspiration for this playdate came from my desire to make "Magic Reindeer Food" with my son. Back in my days as an elementary teacher, a fellow teacher had her students create little bags of oats mixed with glitter with a tag that told the student to sprinkle the magic mixture on their lawn on Christmas Eve to attract Santa's Reindeer. Everyone knows that Reindeer love oats (and glitter!) so they are bound to spot the sparkles and smell the oats from high up in the air and lead Santa's sleigh straight to the source, your house!


I placed some instant oats, some honey bunches of oats cereal (for variety),and a few small canisters of glitter into a serving dish. I added some clear plastic ribbon tie bags (which are actually Wilton lollipop bags) for the kids to use to hold their finished product. These were all items I already had in my pantry and in my craft bins!


In addition to their Magic Reindeer Food, each little one was given a glittery antler visor, a reindeer rubber ducky (both from Oriental Trading), and an adorable felt reindeer pull string bag (found in the Target Dollar Spot) as their favors. 


I had planned on making a few reindeer themed games to go along with my theme, but after looking at the attendee list, I realized that several of the kiddos were two and under and some of my ideas might be best used next year when they have another year under their belts. I opted instead to use a simple inflatable reindeer antler toss game (purchased from Oriental Trading.)


To add an additional activity and create a fun take home item, I set up a reindeer thumbprint ornament making station. These turned out to be adorable and super easy to make. Each ornament kit came individually packaged with clear directions (from Oriental Trading.) The only thing that wasn't included in the kits were some sort of adhesive to attach the reindeer google eyes. Luckily, I had some glue dots on hand from another project, so the problem was solved.


I brought our green playroom table and chairs up from the basement playroom and set up a Play-Doh station with Christmas shaped cookie cutters, rollers and other tools. I decided to use only white Play-Doh from our stash since it was kind of wintery (snowy) looking and we were having the playdate in our main living room. While we have hardwood floors throughout the area, we also have a light beige area rug and wasn't in the mood to pick smashed brightly colored Play-Doh pieces out of the fibers over the weekend. Luckily, things didn't get too out of hand and the mess stayed on or near the table.


Check out these cuties in their reindeer antlers. So cute!


 May the your Magic Reindeer Food attract Dasher, Dancer, Prancer, Vixen, Comet, Cupid, Donner, Blitzen, and of course, Rudolph. Happy Holidays!
 

Wednesday, October 29, 2014

Party Time: Halloween Monster Bash

Halloween is a favorite holiday in our household, but with a little person around, we have to mix in sweet and nix the scary. What better way to celebrate than to host a not-so-scary Halloween Monster Bash? I'll admit that this party was a bit of a last minute throw together and I cut some corners when it came to preparation, but hopefully it doesn't show in the final product! Still, it was fun to plan and I think everyone had a good time.

I picked up the October Halloween issue of Better Homes and Gardens and saw an adorable Monster Party featured in its pages. Using that as my overall inspiration and creative springboard, I mixed several of their FREE Monster Party printables including a really cute invitation that was easy to assemble, a printable "Happy Halloween" garland,  and printable "Happy Monster" hat pieces, with things I either had around the house, or could easily be created with a few simple supplies.


If you've seen photos of any of our other parties, you'll know that our island usually gets a starring role. Our house is open from the living room into the kitchen, so I typically use the island as the party's central focus. I covered the surface using 2 yards each of a polka dot and orange and white chevron print. I picked both of these fabrics because I feel that they have the potential to be reused in the future (I already have a plan to use the orange and white chevron for my Thanksgiving tablescape.) I recreated the pompom garland that I saw in the magazine shoot using different sized pompoms, a needle and upholstery thread and hung it between the pendant lights.

 
I purchased three new chevron pillow covers (two in green and white and one in orange and white) to bring the party theme into the living room. I also swapped out our regular leather ottoman with the green table and matching stools from the playroom to make it more kid friendly and to provide additional seating for our little guests. On the table, I placed a basket with a Halloween themed Bingo game (I purchased the game for $5 at Target and used candy corn as game markers.)
 
 
Extra pompoms were placed in a clear plastic paint can (found in the Target Dollar Spot for $3) and made for a no-fuss table centerpiece.
 
 
The table was also the home of the build-your-own Monster hat station. Since the kids were too little to handle the scissors, this turned into an activity for the parents. The "Happy Monster" face printables were part of the BH&G Monster Pack.
 
 
I handmade the treat bags with stiffened felt and a glue gun using BH&G Monster Pack treat bag pattern. Each treat bag was filled with a light up creepy crawly insect (purchased at Dollar Tree for $1 each,) a mini container of bubbles (12 for $3 at Target,) and some silly vampire teeth ($2 for a pack at Target.) I also added some 24 piece Monster puzzles and some fun Monster Play Packs containing a small coloring book, crayons, and stickers to the treat display since they were too big to fit in the treat bags ($1 each in the Target Dollar Spot.)
 
 
In addition to having Pizza Hut pizza delivered, we had a popcorn bar (I totally didn't update the labels from the last party we hosted!) I completely took the easy way out with the food for this party.

 
I had originally planned on slicing up apples for the caramel apple dip, but at the last minute, decided against it and made a chalk board sign with directions to cut your own. I was worried that the apples might brown sitting out on the counter even if I added some lemon juice to them and to be honest, I didn't want to have a bunch of extra sliced apples after the party to either quickly eat or end up in the trash. Plus, all the kiddos were coming with their parents so it wasn't like we'd end up with any knife wielding toddlers.


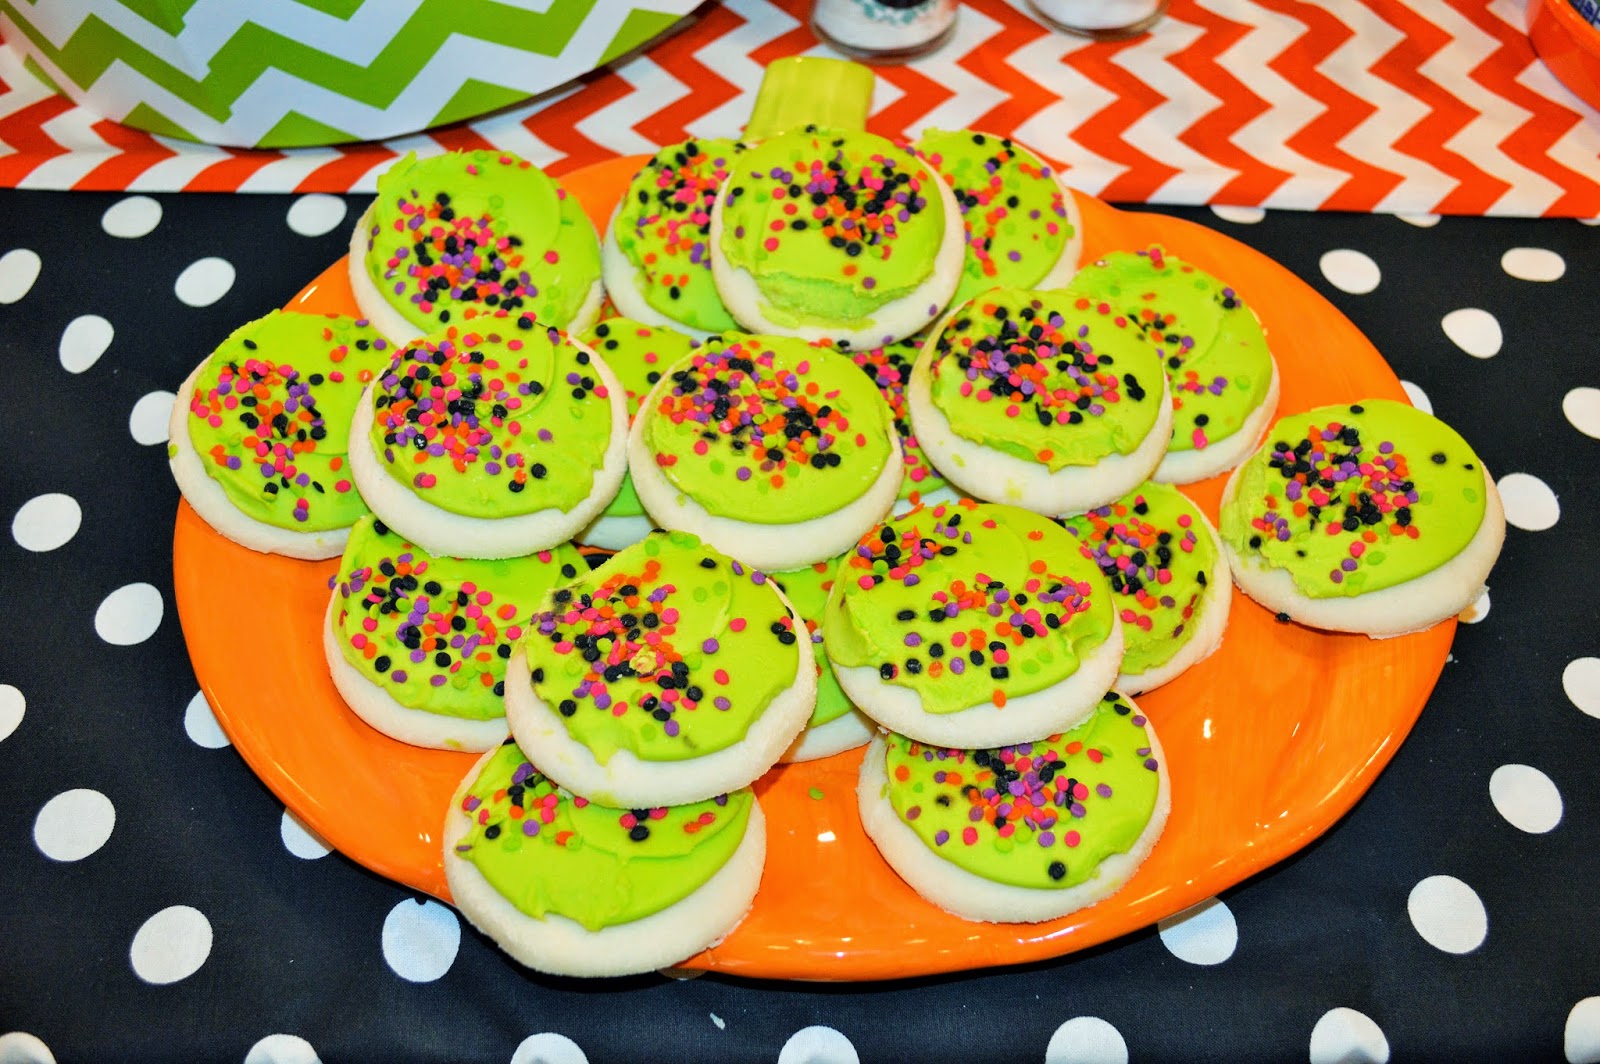
Sweets were also a product of my lack of time and preparation. It was either purchase some store bought treats or find myself baking at midnight the night before the party. Luckily, Kroger came to the rescue with these pretty and tasty cupcakes and cookies.
 
 
Dressing up our entry table for the occasion, I added some light-up Jack-o-lanterns and monster stacking boxes from our Halloween decoration stash along with a mini pumpkin my son had decorated with glitter at preschool. Topped off with some more pompom garland and a string of mini pennants, it made for a cute display.


The BH&G magazine shoot suggested using a local print shop to enlarge a monster scene to create a giant coloring mural, but when I researched the printing costs, it was going to run me close to $60! Instead, I picked up two white trifold display boards (the type you use for science project displays for $3 each,) taped them together, and tied them to my banister. Then, I took a sharpie marker and drew the scene free hand. Sure, I could have printed something out and then used a projector and traced it all out, but since I was literally starting on this at nine thirty the night before the party, I opted for the quickest and easiest option. The whole project took me about twenty minutes. My son is still coloring on it and I've agreed to leave it up through Halloween.
 
Have a very Happy (and not-so-spooky) Halloween!